As I have noticed, WordPress have been improving a lot. The look and feel in Wordpress.com and WordPress.org now has much distinction. Like they are now having they own identity. Though yeah there are a lots of comparison to both.
Wordpress.com 2019 has a different user interface at admin dashboard compared in the past which amazes me.
So let's jump right to the point why we are here.
To Create a Free WordPress Website Blog Step by Step 2019
All you need to do is visit wordpress.com and start. These are the steps we will encounter:
- Sign up for your Account
- Create your website (Niche)
- Validate email address
- Choose website address
- Select a Plan - Free
Let's get started!
1. First sign up for an account using a valid email address.
2. Choose your niche.
For me, I have in mind about food. Which makes me feel kinda hungry at the moment.
(And if you want to create another website, let say you want to make another website about sports, then start again here at this step #2 or click this link )
3. Validate your email address.
Visit you email inbox and click confirm now to continue.
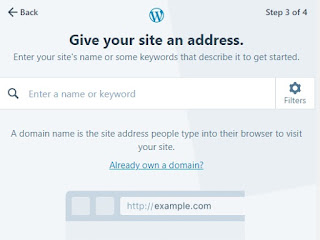
4. Type your website address.
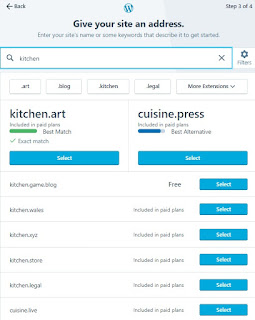
In my blog site since I choose the topic about cooking food. You can type in a keyword for example "food", "cooking", "recipe". And I had in mind for my website address to be "my kitchen skills" at first, then I head on and try if the keyword is available.


As you can see my keyword results below, there are lots of options to choose. But since I am after for a FREE website so my only option is the the available website address that is FREE. In the past, for WordPress.com if my keyword is available it would have been like this "kitchenskill.wordpress.com" or "mykitchen.wordpress.com". But these two website address are not in the sub-domain now. If you wanted it to be under wordpress.com you gotta pay for it now, will in the past that was the FREE option we had. And since wordpress.com has offered these changes you can see below for website addresses below then will just choose the FREE PLAN since plan not to spend a cent.So now the final judgement is here, my website address is mykitchen.video.blog
5. Choose a plan.
If you want it free then you click on "Start with free" then continue.
We are now at wordpress.com/checklist , whenever you want to go check what stage you are at, do visit the checklist link as your guide.
Writing you website description. It should be powerful sentence that describes what your website is about and to be it an SEO friendly it should contain your keywords in there.
Nest is to upload your favicon, it is the picture/icon you can see at your address bar beside the address name. For me since my website address and website name is " My Kitchen", I got it's initial and head to paint. Yes, my simple favicon was quickly made from paint and you can customize your own to. You can choose any picture you like that would describe your website it serves as your website's LOGO.
Adding content in your contact page. The contact form was already there in when my website was created, contact page exist - so you can add in your message below.
And here I have created my first post.
My FREE WordPress.com website is done. You can visit my FREE WordPress.com website here mykitchen.video.blog
We can add in more post and page to add content in our site.
You are free to explore WordPress dashboard. Go to themes and experiment what your website you want to look like. For free plan we just have limited choices of theme, but it's okay for start to explore and FREE is pretty amazing!
How to create multiple WordPress blogs with the same email
First, log in with your WordPress.com account, then follow step 2 above.
Hope this helps.


No comments:
Post a Comment